
10 STEM Activities to Try at Home
Ten STEM experiments you can run at home with everyday materials, each with what you need and how it works.
STEM stands for science, technology, engineering and maths. Running STEM activities at home gives a child a holistic and concrete understanding of what they meet day to day, and it matters for their cognitive development.
Packaged creatively, learning STEM at home becomes something a child looks forward to. Here are ten activities to try.
1. A Pyramid of Plastic Cups

Every child enjoys stacking things into a tower, and that works as a STEM activity. You need a stack of plastic cups, a ruler and a stopwatch.
Show them an example, then challenge them to build the tallest pyramid they can within a set time, say 5 to 10 minutes on the stopwatch. Once it's built, measure the height with the ruler.
If the tower collapses partway through, that's the opening to explain gravity. Alongside the science, a child meets numeracy through measuring both the height and the time taken.
2. The Walking Water Experiment
Water can move between containers through capillary action, travelling along the fibres of a material. You need seven glasses, kitchen roll, water and food colouring.
Line up five glasses and fill the first, third and fifth with water. Add colouring to the filled glasses, then fold lengths of kitchen roll and bridge each glass to the next. Wait a while and the water moves across.
3. A Number Hop Game
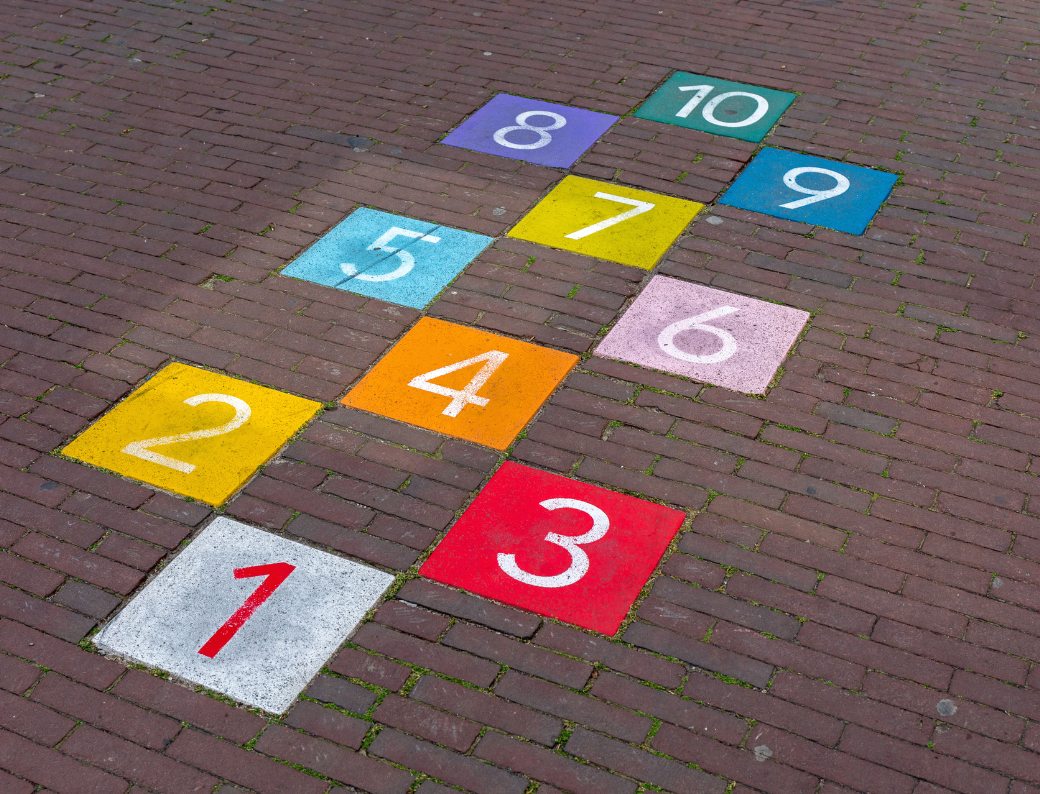
More than a game, this works as an enjoyable maths activity. The materials are simple, needing only paper, a marker and tape.
Write the numbers 1 to 10 on separate sheets, lay them on the floor and tape down the edges. Play music so your child circles the sheets, then call out a number mid-song and they jump to it. Repeat until the song ends.
Outdoors you can swap the paper for coloured chalk and write the numbers straight onto the ground.
4. A Self-Inflating Balloon
Instead of blowing a balloon up, this one inflates itself. You need a balloon, bicarbonate of soda, vinegar and a plastic bottle.
Put vinegar and water into the bottle, roughly a quarter each, and mix. Put bicarbonate of soda into the balloon and fit the balloon over the neck of the bottle, keeping the powder out of the liquid until you're ready.
Your child then watches the balloon inflate without being blown up. That happens because vinegar and bicarbonate of soda react to produce a gas.
5. A Simple Compass
Introducing a child to compass directions can be genuinely enjoyable. You need a bowl of water, a needle, a magnet and a small circle of polystyrene.
Stroke the needle along the magnet repeatedly in one direction, which magnetises it. Rest the needle on the polystyrene and let it float in the bowl, and it settles pointing north and south. Mark north and south, then turn the bowl and watch the needle rotate back to the same alignment.
6. A Cardboard Projector
This one is building a mini projector from a box. You need a shoebox, black tape, scissors, a craft knife, a magnifying glass and a phone.
Cut a hole in the box to match the magnifying glass, then fit the glass with the handle upwards and tape it in place with the black tape. Put the phone inside with the screen facing the glass and the image inverted, with auto-rotate switched off. Turn the room lights off and play a video, and the projector works.
7. An Erupting Volcano
This simple project explains a chemical reaction well. You need 10ml of washing-up liquid, 100ml of cold water, 400ml of vinegar, food colouring, two empty 1.5 litre bottles, and half a glass of bicarbonate of soda mixed with half a glass of water.
Combine the vinegar, water, soap and two drops of colouring in the empty bottle, then pour in the bicarbonate solution. Stand back, because the liquid comes straight up and over.
8. Magnetic Slime
If your child likes slime, this turns it into a STEM activity. You need slime, magnetic powder and a magnet in any shape that's safe to handle. Coat the slime in the powder, bring the magnet close and pull slowly, and the slime follows it.
Supervise this one throughout. Wash hands afterwards so the magnetic powder doesn't stay on them.
9. An Origami Windmill

Making a windmill is easier than it looks. You need large origami paper, scissors, tape and a thin strip of wood. Fold the paper into a fan or propeller shape and make a hole through the centre, then shape the wood into a T with tape and trim one side so it resembles an inverted L.
Push the centre of the propeller onto the wood and it's finished. Adding a paper cup at the bottom gives a child something to hold while they run and spin it.
10. A Rainbow Lamp
This one reliably delights. You need wide clear tape, coloured markers and a torch. Cut lengths of the clear tape and lay them across the opening of the roll until one side is covered.
Draw a rainbow across the top with the coloured markers. Turn the room lights off, shine the torch through the coloured tape, and the rainbow lamp appears.
Presented like this, STEM becomes something a child waits for rather than endures. You can support it further by enrolling them in a STEM class, and Happy Kamper lists options with locations and current prices shown.
Read also: 9 DIY Project Ideas for a School Holiday
Finding a STEM Class
Finding children's activities including STEM is straightforward through Happy Kamper. Science, technology, engineering and maths classes are listed from a range of providers, across Jabodetabek, Bandung, Surabaya, Yogyakarta, Bali and other cities.
Brick and Robotics at CK Education
The engineering and maths side of STEM can be trained through a brick and robotics class. Children tend to stay engaged because the teaching is built around creative learning. More detail on their Instagram, @creativekids_education.
Roblox Development at Kodiokids
If your child plays Roblox, a Roblox development class is a natural fit. Children learn to build 3D objects and games alongside others their own age. More detail at @kodiokids.
Coding at Koding Next Indonesia
This coding class has grouped children by age, covering roughly 4 to 6, 8 to 12 and 12 to 16, with different material for each, from fundamentals through to game and app development. More detail on their Instagram, @kodingnext.
Confirm current programmes and fees with each provider directly. It's worth comparing a few before committing to a term.